Gardening for sustainability transforms your backyard into a thriving ecosystem that conserves water, builds healthy soil, supports local wildlife, and reduces your environmental footprint. The method centers on working with nature rather than against it: composting kitchen scraps to enrich soil, choosing native plants that thrive without chemical inputs, collecting rainwater for irrigation, and creating habitat for pollinators and beneficial insects. Most gardeners see measurable results within a single growing season, and the practices become easier each year as your garden becomes more self-sustaining.
The beauty of sustainable gardening lies in its accessibility. You don’t need expensive equipment or a degree in horticulture. Start with one practice that fits your space and schedule, whether that’s a small compost bin on an apartment balcony or converting a corner of your lawn to native wildflowers. Maria Chen, a community garden volunteer in Portland, began with a single rain barrel in 2023. By 2026, her entire yard operates on harvested rainwater, and she’s helped a dozen neighbors set up their own systems.
The environmental impact extends far beyond your property line. Sustainable gardens reduce stormwater runoff, sequester carbon in healthy soil, and provide critical corridors for declining pollinator populations. When you eliminate synthetic fertilizers and pesticides, you’re protecting local waterways and the wider ecosystem.
This guide walks you through proven techniques that turn any garden into a sustainable sanctuary. You’ll learn exactly what materials you need, how to implement each practice safely and effectively, and how to verify your garden is truly supporting ecological health.
What You’ll Need to Get Started
You don’t need to spend hundreds of dollars or buy specialized equipment to start sustainable gardening. Most essential items are simple, affordable, and built to last for years. Focus on quality basics rather than accumulating unnecessary tools, and look for opportunities to source materials locally or secondhand.
Start with these core categories of supplies:
- Hand tools: sturdy shovel, garden fork, hand trowel, pruning shears, and a hoe for weeding
- Composting supplies: bin or designated pile area, pitchfork for turning, and kitchen scrap container
- Water conservation equipment: rain barrel with spigot, soaker hoses or drip irrigation tubing, and mulch materials
- Plant selection resources: native plant guides for your region, seed catalogs from local suppliers, and contact information for native plant nurseries
- Soil testing: home pH test kit or county extension soil test service
Choose tools with solid metal heads and comfortable handles that fit your grip. Cheap plastic-handled tools break quickly and end up in landfills, defeating your sustainability goals. Many Extension Master Gardener programs host tool swaps where you can find quality used items.
For composting, a simple three-sided bin made from wooden pallets works as well as expensive tumblers. You’ll want browns (dry leaves, cardboard) and greens (food scraps, grass clippings) on hand to maintain the right balance.
Rain barrels can often be purchased at discounted rates through local conservation districts or repurposed from food-grade containers. Make sure yours includes a screen to keep out mosquitoes and debris.
The most valuable resource costs nothing: knowledge from your local extension office. They provide free soil testing, native plant lists specific to your county, and workshops on sustainable techniques. Connect with them before you buy anything else.
Important Considerations Before You Begin
Before you dig in, take time to protect yourself and your local ecosystem. A few smart precautions now prevent problems down the road.
Start with physical safety basics. Wear gloves when handling soil, tools, and plants to protect against cuts, thorns, and potential allergens. Use sunscreen, a wide-brimmed hat, and light long sleeves during extended outdoor work, skin cancer is a real risk for gardeners. When moving heavy bags of compost or mulch, bend at the knees and keep your back straight to avoid injury. Take breaks in the shade to prevent heat exhaustion, especially during summer months.
Sharp tools deserve respect. Keep pruners, spades, and saws clean and properly maintained. Dull blades require more force and can slip, causing injury. Store tools safely when not in use, and teach children to ask before touching garden equipment.
Environmental awareness matters as much as personal safety. Contact your county Extension office or local native plant society to learn which species support your area’s wildlife and which ones spread aggressively. Some municipalities restrict water collection or require permits for certain garden structures, so verify local regulations before installing rain barrels or building large compost bins.
Timing affects your success too. Spring and fall offer ideal planting windows for most native species, giving roots time to establish before temperature extremes hit. Avoid tilling wet soil, it destroys soil structure and creates compacted clumps that suffocate plant roots and beneficial organisms. Wait until soil crumbles easily in your hand.
Step-by-Step Sustainable Gardening Process
Assess Your Garden and Set Goals
Start by walking your garden at different times of day to understand what you’re working with. Notice which areas get full sun (six-plus hours), partial shade, or deep shade. After a rain, check where water pools and where it drains quickly. Squeeze a handful of soil: does it clump into a ball or crumble apart? This tells you about clay versus sandy content.
Next, observe the wildlife already visiting. Are there pollinators? Birds? Note bare spots where nothing grows and areas where plants thrive naturally.
Now set goals that match your reality. If you have twenty minutes weekly, start with a small native plant bed rather than overhauling everything. In a sunny yard, prioritize pollinator plants. Poor drainage? Focus on rain garden techniques. Make your goals specific: “Plant three native species this spring” beats “help wildlife” as a target.
List what matters most to you: water conservation, supporting bees, reducing lawn, building soil. Rank them. Your top two become this year’s focus areas, keeping the project manageable while still making meaningful progress toward sustainability.
Build Healthy Soil Naturally
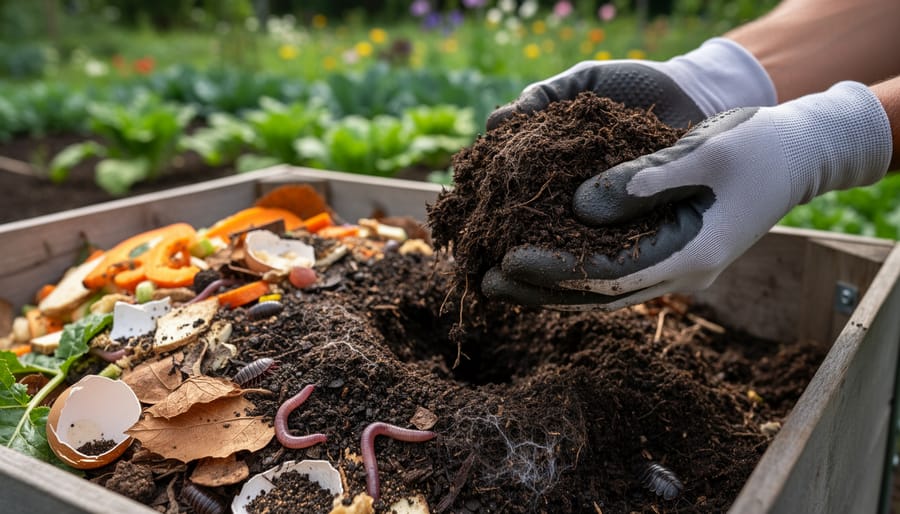
Healthy soil is the foundation of any sustainable garden, teeming with billions of microorganisms that feed your plants naturally. Start by testing your soil’s pH and nutrient levels with a simple kit from your local extension office, this tells you what your soil actually needs rather than guessing.
Begin composting kitchen scraps and yard waste in a bin or pile. Layer “greens” (vegetable peels, coffee grounds, fresh grass clippings) with “browns” (dry leaves, cardboard, straw) in roughly equal proportions. Turn the pile every few weeks to speed decomposition. Within three to six months, you’ll have rich, dark compost ready to spread.
Apply a two-to-three-inch layer of organic mulch around plants each spring and fall. Wood chips, shredded leaves, or straw suppress weeds, retain moisture, and gradually break down to feed soil organisms. Keep mulch a few inches away from plant stems to prevent rot.
Skip synthetic fertilizers and pesticides, they kill beneficial earthworms, fungi, and bacteria that create wildlife-friendly soil. Instead, feed the soil food web with compost, aged manure, or organic matter. As these decompose, they release nutrients slowly while improving soil structure. You’ll notice darker, crumblier soil that drains well yet holds moisture, signs your underground ecosystem is thriving.
Choose and Plant Native Species
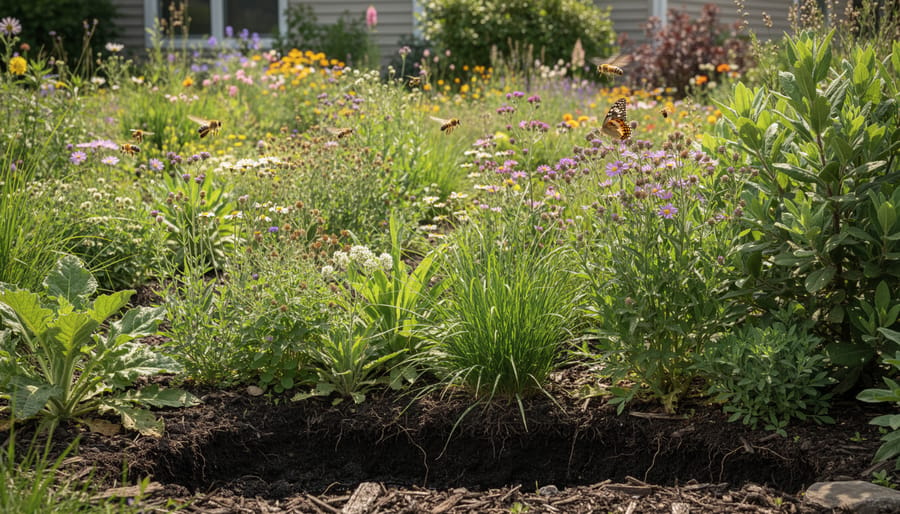
Start by identifying native plants suited to your specific region and conditions. Contact your local Extension office or visit regional native plant society websites to get lists of species that naturally thrive in your area. Look for plants that serve multiple purposes, providing nectar for pollinators, berries for birds, or host leaves for butterfly caterpillars.
When selecting plants, aim for a variety that blooms throughout the growing season. This ensures continuous food sources for pollinators from early spring through fall. Choose different heights and structures: groundcovers, mid-height perennials, shrubs, and small trees if space allows. This layered approach creates diverse habitats where different wildlife species can nest, feed, and shelter.
Purchase plants from reputable native nurseries rather than big-box stores, which often sell cultivars that don’t support wildlife as effectively. Many native plant sales happen through botanical gardens, conservation groups, or Extension Master Gardener programs in spring and fall.
Before planting, prepare each hole to match the plant’s root ball depth, planting too deep is a common mistake that stresses natives. Remove container plants gently, loosening circled roots. Water thoroughly after planting and apply mulch around (not touching) the stem. Native plants typically need regular watering their first year while establishing roots, then require minimal irrigation once settled.
Implement Water Conservation Methods
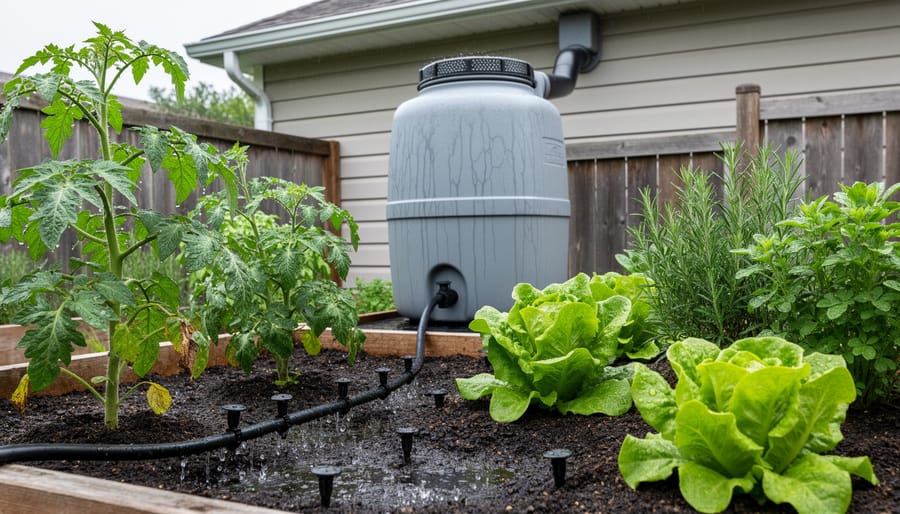
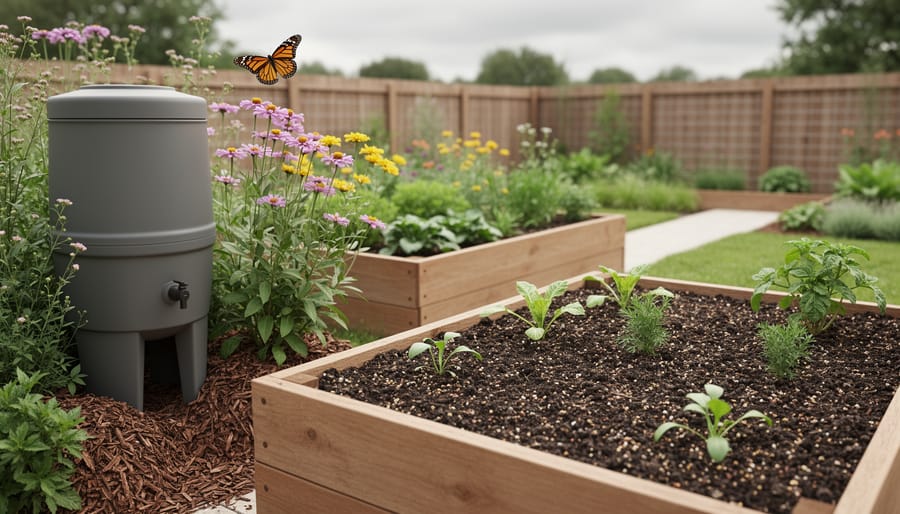
Start with a rain barrel to capture roof runoff. Position it under a downspout on a stable, level base. Use a mesh screen over the opening to keep out debris and mosquitoes. Connect a spigot near the bottom for easy watering access. Most barrels hold 50-60 gallons and can reduce your outdoor water use by 1,300 gallons during peak growing season.
For drip irrigation, lay soaker hoses or drip lines directly on the soil around plant roots before mulching. This delivers water exactly where needed, cutting evaporation by up to 50% compared to overhead sprinklers. Run your system early morning when temperatures are coolest.
Apply 2-3 inches of organic mulch around plants, keeping it an inch away from stems to prevent rot. Wood chips, shredded leaves, or straw work well. Mulch slows evaporation, moderates soil temperature, and suppresses weeds that compete for moisture.
Group plants by water needs into zones. Place thirsty vegetables together near your water source, while drought-tolerant natives go in drier spots. This prevents overwatering some plants while underwatering others. Check soil moisture with your finger before watering, if the top inch feels damp, wait another day.
Create Wildlife Habitats
Start by layering native flowering plants that bloom at different times, ensuring food sources span spring through fall. Choose species that provide nectar, pollen, and seeds. Plant in clusters rather than singles so pollinators can feed efficiently.
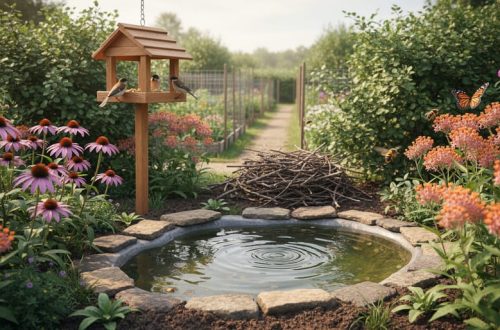
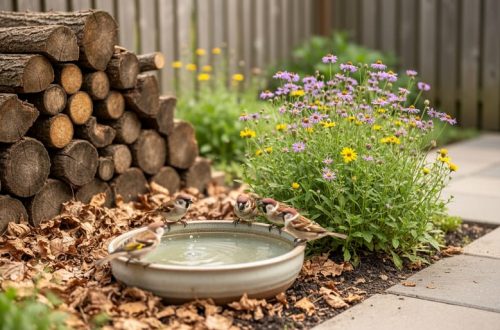
Add a shallow water source like a birdbath or small dish with pebbles for landing spots. Refresh water every few days to prevent mosquito breeding. Position it where birds have clear sight lines to spot predators.
Create shelter zones by leaving a corner of your garden slightly wild. Stack pruned branches into loose brush piles for small mammals and ground-nesting birds. These habitat features also house beneficial insects that control pests.
Install nesting boxes suited to local species and hang them at recommended heights. Face openings away from prevailing winds.
Leave dead flower heads standing through winter instead of cutting everything back. Seed-eating birds rely on these, and hollow stems shelter native bees. Following these wildlife habitat steps transforms your garden into a functioning ecosystem that supports dozens of species year-round.
Maintain Using Eco-Friendly Practices
Once your sustainable garden is established, consistent eco-friendly maintenance keeps it healthy and productive year-round. These ongoing practices build on what you’ve created while supporting the natural systems at work.
- Conduct seasonal assessments each spring and fall to evaluate plant health, soil condition, and wildlife activity, noting what’s thriving and what needs adjustment.
- Address pest problems with natural controls first: hand-pick larger insects, spray aphids with water, introduce beneficial predators like ladybugs, or use neem oil as a last resort for serious infestations.
- Return garden waste to the soil by composting plant trimmings, fallen leaves, and spent flowers rather than bagging them for disposal.
- Adjust watering schedules with the seasons, reduce frequency as plants establish deeper roots and increase only during genuine drought stress, not on a fixed calendar.
- Monitor for wildlife signs like bird nests, pollinator visits, and beneficial insects to confirm your habitat features are working.
Leave seed heads standing through winter instead of cutting everything back. They provide food for birds and overwintering sites for native bees. Apply fresh mulch each spring to suppress weeds and retain moisture, but keep it a few inches away from plant stems to prevent rot.
Skip the pesticides entirely, even organic ones, unless you face a genuine threat to plant survival. Most pest damage is cosmetic, and a healthy ecosystem naturally keeps populations in check. Resist the urge to make your garden too tidy, some messiness supports the wildlife you’ve worked to attract.
How to Know Your Garden Is Thriving Sustainably
Your sustainable garden will show clear signs it’s working. Healthy soil crumbles easily in your hand and smells earthy, not sour. You’ll notice more pollinators visiting flowers, birds foraging for insects, and beneficial predators like ladybugs appearing naturally. Plants grow vigorously with deep green foliage and need less supplemental watering as their roots establish. You’re using less water overall, and your compost bin transforms kitchen scraps into rich amendment without buying fertilizers.
Track your progress simply. Take photos each season to document changes in plant health and garden biodiversity. Keep a basic journal noting which pollinators you see, when birds nest, and how often you water compared to previous years. If plants struggle, check soil moisture and drainage rather than reaching for quick fixes.
When something isn’t working, adjust one practice at a time. Mulch breaking down too slowly might need smaller pieces. Persistent pests could signal your garden needs more diverse plantings to attract predators. Yellowing leaves often mean drainage issues or compacted soil, not necessarily nutrient deficiency.
Deepen your journey by expanding habitat areas gradually, trying new native species each year, and connecting with local gardening groups to share seeds and knowledge. Your sustainable garden becomes more resilient and self-sufficient with each season, requiring less work while supporting more life.
Stories from Our Community
Maria, an Extension Master Gardener in suburban Chicago, started small by converting just one corner of her lawn into a native plant bed. “I didn’t rip out everything at once,” she explains. Within two months, she noticed monarch butterflies visiting daily. Three years later, her entire front yard supports pollinators, and neighbors have followed suit. Her advice: start with a manageable 100-square-foot area and expand as you gain confidence.
The Downtown Green Collective transformed abandoned pavement into thriving urban community gardens using only salvaged materials and rainwater collection. Volunteers built raised beds from reclaimed wood and filled them with compost made from local coffee shops. They now produce vegetables for food banks while teaching sustainable techniques to over 200 residents annually.
Tom’s experience shows sustainable gardening works even in rental properties. He focused on container gardens filled with native wildflowers and herbs, which he could take when moving. “I composted in a small bin on my balcony and collected rainwater in food-grade buckets,” he shares. His portable garden attracted hummingbirds and proved you don’t need permanent space to make an impact.
Common Questions About Sustainable Gardening
Is sustainable gardening more expensive than conventional gardening?
Starting costs can be similar or even lower since you’ll focus on composting, mulching, and native plants rather than purchasing synthetic fertilizers and pesticides. Over time, sustainable methods save money through reduced water bills, less need for soil amendments, and plants that thrive without constant intervention.
How much time does sustainable gardening require?
After initial setup, sustainable gardens typically need less maintenance than conventional ones. Native plants require less watering and pruning, healthy soil reduces pest problems, and mulch cuts down on weeding, most gardeners spend 2-3 hours weekly once established.
Can I practice sustainable gardening in a small space or with HOA restrictions?
Absolutely. Container gardens with native plants, windowsill herb gardens using organic methods, and balcony pollinator pots all work beautifully. If your HOA limits certain features, focus on what you can control: soil health, native plant choices in approved beds, and water-wise practices that align with existing rules.
Where can I find native plants and learn more?
Local native plant nurseries, county extension offices, and native plant societies offer excellent resources and plant sales. Many communities also host local gardening workshops focused on sustainable techniques where you can connect with experienced gardeners and get region-specific advice.
Making the transition from conventional to sustainable gardening doesn’t have to happen overnight. Start with one area or technique, maybe converting a bed to native plants or starting a compost bin, and build from there as you gain confidence and see results.