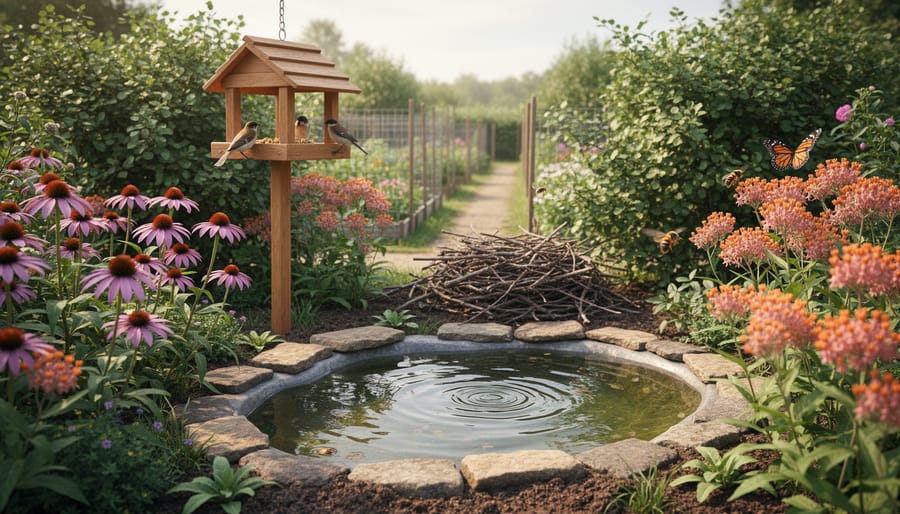
Creating wildlife habitats in your garden takes just a few intentional changes to your existing space. By adding native plants, water sources, shelter, and allowing some natural “mess” to remain, you can transform even a small yard into a thriving ecosystem that supports birds, pollinators, amphibians, and beneficial insects. The process typically requires a weekend to get started, though your habitat will continue to develop and improve over months and years.
Gardens that welcome wildlife don’t need to look wild or unkempt. The secret lies in understanding what creatures need to survive: food throughout the seasons, clean water, places to nest and hide from predators, and corridors to move safely between areas. When you provide these four essentials, wildlife will find you.
Sarah Chen, a community volunteer from Bristol, started with a single bird feeder and a small pond in 2025. Within six months, she counted twelve bird species, countless pollinators, and even a family of hedgehogs visiting her quarter-acre plot. “I thought you needed acres of land,” she says. “Turns out, every garden counts, especially when neighbors get involved.”
The beauty of habitat creation is that you’re working with nature rather than against it. Less mowing, fewer chemicals, and more observation replace the endless battle for pristine lawns. Your garden becomes a living classroom where you’ll witness behaviors most people only see in documentaries. Whether you have a balcony with containers or a sprawling rural property, the principles remain the same.
Understanding What Wildlife Needs from Your Garden
Wildlife doesn’t just visit your garden looking for beauty, they need four critical resources to survive and thrive. Understanding the features of habitat that make a space truly welcoming means providing food, water, shelter, and safe places to raise young.
Food sources should include year-round options. Native plants naturally offer nectar, berries, seeds, and leaves that local wildlife evolved to eat, while also supporting the insects that birds and other creatures depend on. Different species feed at different heights and seasons, so variety matters.
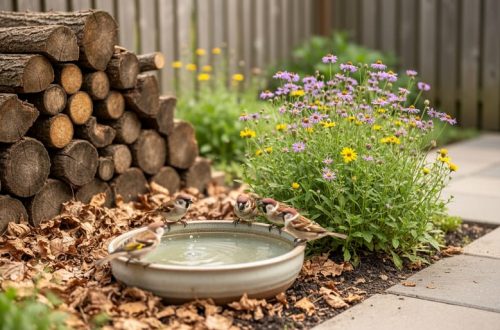
Water needs extend beyond drinking. Birds need shallow areas for bathing, amphibians require breeding pools, and butterflies seek muddy puddles for minerals. Even a simple birdbath refreshed regularly can support surprising biodiversity.
Shelter protects wildlife from weather and predators. Dense shrubs, brush piles, rock walls, and standing dead wood all serve as hiding spots and roosting areas. What might look untidy to us represents safe haven for countless creatures.
Places to raise young complete the habitat puzzle. Birds need nesting cavities or thick branches, butterflies require specific host plants for their caterpillars, and bees seek bare ground or hollow stems. When your garden provides breeding sites, you’ve created not just a rest stop but a true home where wildlife populations can sustain themselves generation after generation.
Tools and Materials You’ll Need
You don’t need specialized equipment or a large budget to start creating wildlife habitats. Most of the essentials are simple, and many can be salvaged from around your home or picked up inexpensively at local garden centers. The key is starting with a few basics and adding more as your garden evolves.
Here’s what you’ll need to get started:
- Native plants: Shrubs, perennials, and grasses suited to your area, check local Extension resources for regional recommendations
- Mulch: Leaves, wood chips, or shredded bark to retain moisture and provide ground-level habitat
- Water containers: Shallow dishes, birdbaths, or old saucers (even a terracotta plant saucer works perfectly)
- Basic tools: Shovel, trowel, pruners, and a garden hose or watering can
- Optional additions: Nest boxes, small logs or branches for brush piles, stones or rocks for basking spots
Many successful wildlife gardeners repurpose household items rather than buying new. Old ceramic bowls become water sources, fallen branches turn into shelter piles, and last fall’s leaves serve as essential mulch and insect habitat. A Master Gardener in Arlington transformed her yard using mostly free materials, collecting native plant divisions from neighbors and building shelter areas from storm-damaged tree limbs.
Start with what you have and expand gradually. You can create meaningful habitat with just three or four native plants and a water source. As you observe which wildlife visits and what they need, you’ll naturally discover what to add next.
Important Considerations Before You Begin
Before transforming your garden, take time to address a few practical matters that’ll save headaches later. Start by checking local regulations about water features, some municipalities have rules about standing water (mosquito concerns) or pond depth, especially if you have young children nearby. Your homeowners association might also have guidelines about certain structures or plants visible from the street.
Plant selection deserves careful research. Native plants are ideal, but avoid anything labeled invasive in your region. The Virginia Department of Conservation and Recreation maintains an invasive species list, cross-reference before buying. What thrives beautifully in one state can wreak havoc in another’s ecosystem.
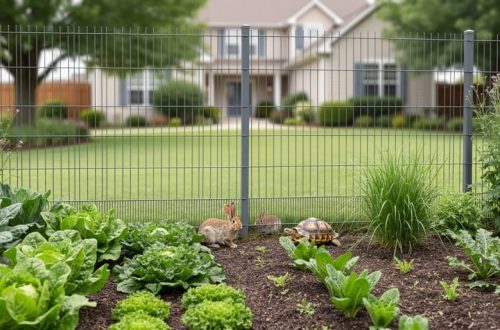
Consider your neighbors early in the planning process. A naturalistic garden with tall grasses and brush piles looks intentional when you explain the purpose, but careless otherwise. A brief conversation or even a shared plant cutting can turn potential complaints into enthusiastic support. If you’re installing wildlife-friendly fencing discuss how it benefits the whole block by keeping everyone’s pets safer.
Finally, accept that you’ll attract all wildlife, not just the photogenic species. Opossums, snakes, and insects are part of a healthy ecosystem. If certain animals genuinely concern you, design around that from the start rather than trying to selectively exclude them later.
Step-by-Step: Building Your Wildlife Habitat
Assess Your Space and Choose Your Focus
Start by walking your garden at different times of day. Notice where sunlight lingers, full sun spots suit prairie flowers that attract butterflies, while shady corners become salamander havens under leaf litter. Dig a small hole to check your soil: sandy, clay-heavy, or loamy? This tells you which native plants will thrive without constant fussing.
Measure your space honestly. A postage-stamp yard can’t support deer, but it’s perfect for bees and songbirds. Even balconies work, container gardening wildlife strategies bring pollinators to small spaces effectively.
Pick one or two wildlife groups to start. If you adore birdsong, focus on seed-bearing plants and water sources. Fascinated by butterflies? Choose host plants for caterpillars alongside nectar flowers. Trying to attract everything immediately leads to scattered efforts and discouragement.
Match your garden’s conditions to wildlife needs, not Pinterest ideals. A partly shady, moist corner naturally supports frogs and ground-nesting bees better than forcing sun-lovers into dim spots. Work with what you have, and you’ll see results within weeks rather than fighting your site for months.
Select and Plant Native Species
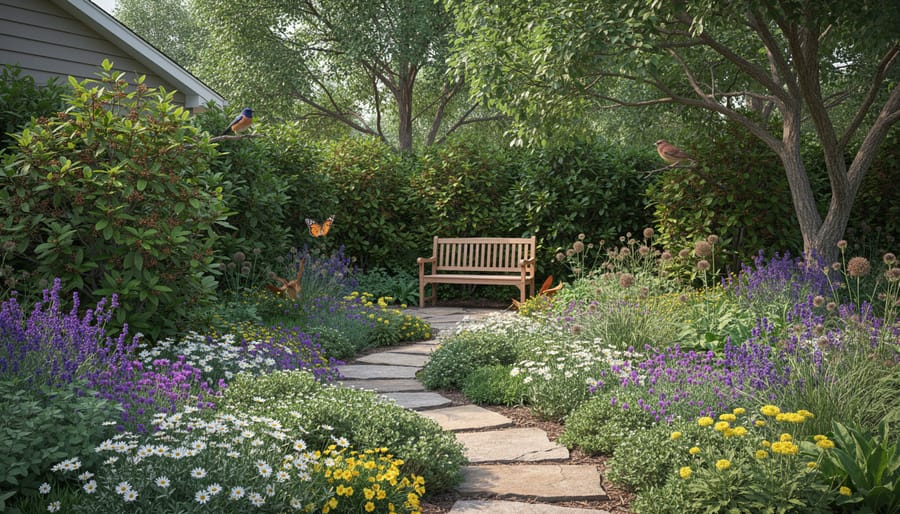
Native plants form the backbone of successful wildlife habitats because they’ve evolved alongside local insects, birds, and other animals for thousands of years. A non-native ornamental might look beautiful, but it often provides little to no food for native caterpillars, which are essential protein sources for baby birds. When you choose natives, you’re plugging into an existing ecosystem rather than decorating around it.
Start by selecting plants that offer food across all four seasons. In Northern Virginia, that might mean oak trees for spring caterpillars, black-eyed Susans for summer pollinators, asters for fall migrating monarchs, and winterberry holly for birds in the coldest months. Arlington County parks showcase excellent examples of this layered approach along Four Mile Run, where you can observe how canopy trees, understory shrubs, and groundcovers work together.
Create vertical structure by thinking in layers. Plant canopy trees like red maples or tulip poplars if you have space, then add midlevel shrubs such as spicebush or viburnum, and finish with groundcovers like wild ginger or woodland phlox. This mimics forest edges where wildlife thrives. Even small Alexandria City gardens can achieve this effect with a single serviceberry tree, a few native azaleas, and creeping phlox underneath.
Before planting, prepare wildlife-friendly soil by adding compost and avoiding synthetic fertilizers. Group plants in clusters of three or more rather than scattering singles throughout the bed, this creates better foraging opportunities and looks more natural. Local Extension offices provide free native plant lists specific to our region’s clay soils and humid climate.
Add Water Sources
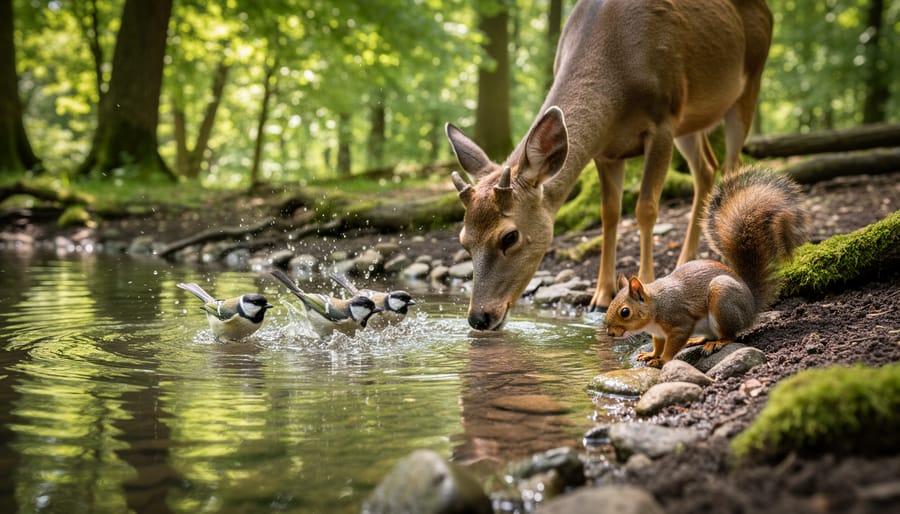
Water is essential for wildlife, birds need it for drinking and bathing, while butterflies, bees, and small mammals rely on accessible sources throughout the day. The good news? You don’t need an elaborate pond to make a difference.
A simple birdbath on a pedestal works beautifully, positioned about three feet high to keep birds safe from predators. Place it near shrubs where birds can retreat if startled, but not so close that cats can ambush them. Change the water every two to three days to prevent mosquito breeding and keep it fresh.
For ground-dwelling creatures, set out shallow dishes or saucers filled with an inch of water and a few pebbles or stones. The rocks create landing spots for insects and prevent small animals from slipping. Butterflies especially love muddy edges where they can “puddle” for minerals.
If you’re feeling ambitious, a small preformed pond liner (2-3 feet across) creates habitat for frogs and dragonflies. Slope one side gradually so animals can enter and exit easily, a critical safety feature that prevents drowning.
The key is consistency. Wildlife learns where water is and returns daily. Even during winter, a heated birdbath becomes a lifeline when natural sources freeze.
Create Shelter and Nesting Sites
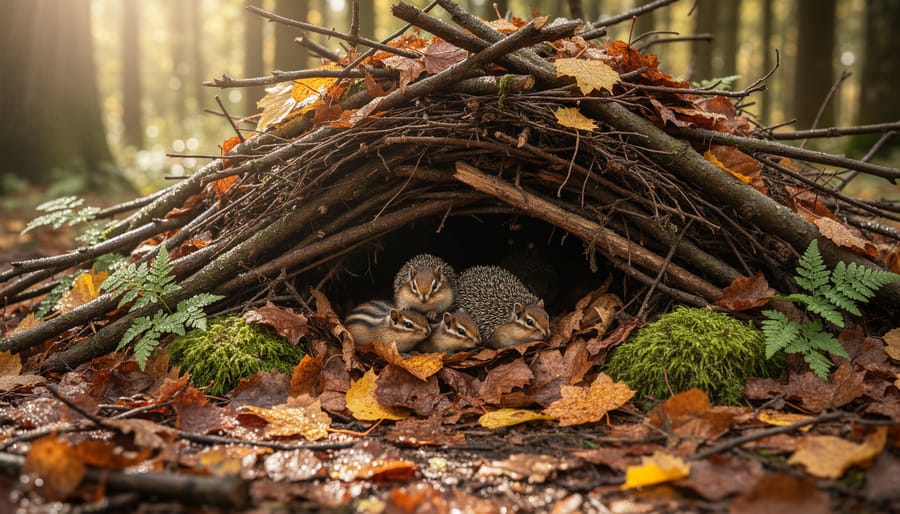
Wildlife needs safe spaces to hide from predators, escape harsh weather, and raise their young. Your garden can provide all three through surprisingly simple features that work with nature instead of against it.
Start with a brush pile in a back corner. Stack fallen branches, twigs, and prunings loosely in a 3-4 foot pile. Leave gaps between layers where small mammals, amphibians, and ground-nesting birds can shelter. One Arlington Master Gardener volunteer reported a family of wrens nesting in her brush pile within two months of building it.
Dead wood belongs in wildlife gardens. That hollow log or standing dead tree (if safe) hosts beetle larvae that woodpeckers feed on, plus cavities for nesting. Even a simple log pile provides salamander habitat and supports decomposers that enrich your soil.
Install nest boxes matched to your target species. Bluebird boxes need different entrance holes than chickadees. Mount them 5-15 feet high, facing away from prevailing winds, and clean them out each fall.
Dense shrub groupings create essential cover. Plant native viburnums, dogwoods, or serviceberries in clusters of three or more. These “messy” thickets might look unmanicured, but they’re exactly what fledgling birds and rabbits need to survive. Local Master Gardener programs offer workshops on building these features while keeping your garden attractive to neighbors.
Eliminate Chemicals and Adopt Organic Practices
Switching to chemical-free gardening is perhaps the most critical step in creating a true wildlife habitat. Pesticides, herbicides, and synthetic fertilizers don’t discriminate, they harm beneficial insects, contaminate water sources, and accumulate in the food chain, affecting birds and other creatures you’re trying to support.
Start by accepting that a wildlife garden will have some nibbled leaves and visiting insects. That’s not damage, it’s evidence your habitat is working. Those caterpillars munching your plants? They’re essential food for baby birds. The aphids? They support ladybugs and lacewings.
For pest problems, try targeted solutions first. Hand-pick larger pests, spray soft-bodied insects with a strong water stream, or introduce beneficial predators. Companion planting, like marigolds near vegetables, naturally deters some pests. If you must intervene, choose organic options like neem oil or insecticidal soap, applied sparingly and only to affected plants.
Replace synthetic fertilizers with compost, which feeds soil organisms and improves structure naturally. A two-to-three-inch layer of mulch suppresses weeds without herbicides while providing habitat for ground beetles and other beneficial insects.
Most importantly, be patient. It takes time for natural predator-prey balances to establish, but once they do, your garden largely maintains itself.
How to Know Your Habitat Is Working
You’ll start seeing results faster than you might expect. Within a few weeks of adding native plants and water sources, you should notice increased butterfly activity and more birds stopping by. Larger changes, like nesting birds or resident populations of beneficial insects, typically take two to three months as wildlife discovers and learns to trust your space.
Watch for these encouraging signs that your habitat is working:
- Birds visiting multiple times daily, not just passing through
- Butterflies and bees actively feeding on flowers rather than just flying overhead
- Evidence of nesting, like birds carrying twigs or investigating nest boxes
- Beneficial insects such as ladybugs, lacewings, and ground beetles appearing
- Healthy plant growth with minimal pest damage, indicating a balanced ecosystem
- Animal tracks, droppings, or disturbed mulch showing nocturnal visitor activity
Keep a simple garden journal, even notes on your phone work. Record what you see, when, and where in your yard. You’ll spot patterns: maybe goldfinches prefer your coneflowers in late afternoon, or toads emerge near the water feature at dusk. These observations help you understand what’s working and what needs adjustment.
Consider joining citizen science projects like the Great Backyard Bird Count or Monarch Watch, which connect your observations to larger conservation efforts. Many gardening workshops teach identification skills that make monitoring easier and more rewarding.
If you’re not seeing the wildlife you hoped for after a few months, don’t get discouraged. Check whether you’re providing all four habitat elements, food, water, shelter, and nesting sites. Sometimes a small adjustment, like moving a birdbath to a more visible location or adding another native plant species, makes all the difference.
Next Steps: Expanding and Certifying Your Habitat
Once your garden shows signs of thriving wildlife activity, consider expanding your impact beyond your property line. The National Wildlife Federation’s Garden for Wildlife program offers free certification that recognizes your efforts and connects you with thousands of other wildlife gardeners nationwide. The application takes about fifteen minutes and provides a tangible milestone to celebrate your work.
Talk with neighbors about creating wildlife corridors, connected patches of habitat that allow animals to move safely between yards. Even a small gap in fencing or a shared hedgerow makes a difference. Some neighborhoods have organized “habitat blocks” where multiple households coordinate their plantings.
Extension Master Gardener programs in Arlington County and Alexandria City regularly host workshops on wildlife gardening topics, from native plant selection to building rain gardens. These free or low-cost sessions connect you with experienced volunteers who’ve tackled the same challenges you’re facing. Many Master Gardeners also offer site consultations and can provide region-specific advice.
Join local nature groups or participate in citizen science projects like the Great Backyard Bird Count. These activities deepen your understanding while contributing valuable data to conservation research. Your wildlife garden becomes part of something larger, a community-wide effort to support biodiversity right where you live.
Common Questions About Wildlife Gardening
Starting a wildlife garden often raises practical questions. Here are answers to the most common concerns from gardeners taking their first steps toward creating habitats.
Can my small garden really make a difference for wildlife?
Absolutely. Even container gardens on balconies can provide nectar for pollinators and water for birds. When small gardens connect across a neighborhood, they create vital wildlife corridors that support local ecosystems.
How do I keep deer from destroying my wildlife plants?
Focus on deer-resistant native plants like Virginia sweetspire, eastern red cedar, and ferns. Protect young plantings with temporary fencing until they’re established, and accept that deer are part of the ecosystem too.
Won’t attracting wildlife mean dealing with more mosquitoes and pests?
Wildlife gardens actually help control pests naturally. Birds, bats, dragonflies, and frogs all feed on mosquitoes, while eliminating standing water in containers prevents mosquito breeding.
What maintenance does a wildlife garden need through the seasons?
Less than you’d think. Leave seed heads and plant stems standing through winter for food and shelter, delay spring cleanup until temperatures consistently reach 50 degrees, and resist the urge to over-tidy.
Many gardeners worry their wildlife habitat will look messy or unkempt. The key is intentional design. Create defined “wild zones” with brush piles and tall grasses in back corners or along property lines, while maintaining more manicured areas near pathways and seating. Native perennial borders can be just as beautiful as traditional ornamental beds while serving wildlife. Adding simple labels or small signs explaining habitat features helps neighbors understand your purpose.
The transition to wildlife gardening doesn’t have to be all-or-nothing. Start with one bird-friendly native shrub or a small pollinator patch. As you observe which creatures visit and how your garden responds through the seasons, you’ll naturally discover what works for your space and comfort level. Most gardeners find that watching wildlife becomes far more rewarding than maintaining a pristine, sterile landscape ever was.
Creating a wildlife habitat transforms more than your garden, it strengthens the entire community’s connection to nature. Every native plant you add, every water source you maintain, and every chemical you skip contributes to a healthier local ecosystem that benefits both wildlife and neighbors.
Start with just one step this weekend. Plant a native shrub, set out a birdbath, or designate a corner for natural debris. You’ll be surprised how quickly birds, butterflies, and beneficial insects respond.
Local Master Gardener volunteers offer free guidance through workshops and garden consultations. One Arlington Master Gardener, Sarah Chen, began with a single pollinator bed five years ago. Today, her certified wildlife habitat hosts over forty bird species and has inspired six neighboring properties to go chemical-free. “I thought I was just planting flowers,” she says. “Instead, I started a movement.”
Your garden can do the same. The wildlife are waiting.